3.2. Project Window
The Project Window is a sub-window of the Main Window, displaying project information. In general, a project holds meta-information about a set of design files and their relationship, e.g. a parent-child relationship in case a design was generated from another design through refinement. Hence, each file represents a design of the project at one abstraction level. In addition, the project can hold project-specific settings for the design environment, such as the compiling and parsing environment (paths).
At any time, the SCE application can keep one project open and active in memory. The name of this currently active project is displayed in the title bar of the Main Window. The Project Window displays the hierarchical information of design files in the currently active project. If there is no active project, the Project Window is disabled.
The Project Window can be detached or docked. Users can drag the window (by its title bar or handle) to the desired place. If the Project Window is detached, it can be floating and displayed anywhere on the desktop. If the Project Window is docked, it has to be attached to any of the borders of the Main Window.
The Project Window contains three tabs: Models, Imports, and Sources. By clicking the tab at the bottom of the window, the corresponding tab will be activated and brought to the front.
3.2.1. Models Tab
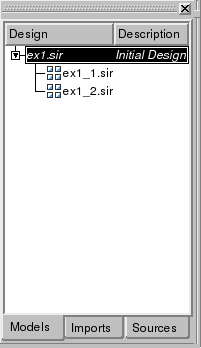
Figure 3-2 shows the the Models tab. The Models tab contains two columns. Column Design displays the name of each design file in the project. If one design is derived or generated from another, the derived design is displayed as the child design of the previous one. The derivation hierarchy is indicated through connecting lines of a tree structure.
Users can select a design by clicking the row in which the design is displayed. Double-clicking on a row will open the corresponding design.
If the design is currently opened and loaded, double-clicking will activate (switch focus to and raise to the front) the corresponding design window in the Workspace (see Section 3.5).
The Column Description shows an optional description of the design. By clicking into the column, the user can edit the description text of the selected design directly in the corresponding table cell.
Right-clicking on a row will open a context menu pop-up for the selected design. The context menu contains four commands:
- Open
Selecting Open will open the selected file (see Section 4.3.1). If the selected design is already opened, the corresponding design window in the workspace will be activated.
- Delete
Selecting Delete will remove the selected file from the project and optionally delete the file on disk (see Section 4.2.7).
- Rename
Selecting Rename will rename the selected file (see Section 4.2.8).
- Change Description
Change Description will trigger editing of the description of the selected file (see Section 4.2.9).
 | Note that renaming and changing of description actions can also be triggered by clicking into the corresponding column of the selected file. |
3.2.2. Imports Tab
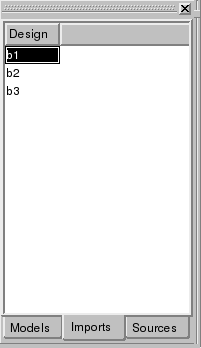
Figure 3-2 shows the Imports tab. The Imports tab displays a lists of imported design names. The list contains the union of all the sub-designs that have been imported directly or indirectly into any of the design files that are part of the project.
Users can select an imported design by clicking the row in which the imported design is displayed. Double-clicking on an imported design opens the corresponding design in the workspace.
Right-clicking on an imported design opens a context-menu pop-up for the selected design. The context menu contains one command:
- Open
Selecting Open will open the import design file (see Section 4.3.1).
 | Note that the opening action is equivalent to double-clicking on the imported design. |
3.2.3. Sources Tab
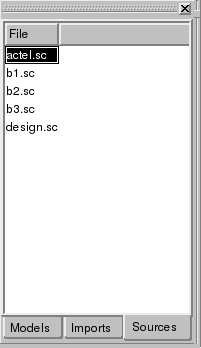
Figure 3-4 shows the Sources tab. The Sources tab displays a lists of names of source files. The list contains the union of all SpecC source files that are sources for the design files that are part of the project.
The Sources tab does not allow any action on the files and is for informative purposes only.


